 the first step of our invites Scrapple and I are getting married in August (yeay!) and for the past few months I’ve been immersed in planning and crafting. I'm trying to save cash for the farm and make our big day more sustainable while giving it an aesthetic that has our own special feel. Making our invites turned out to be a great example. I thought I'd share how I did it as the research part took some time and I uncovered a few gems during the process. It was a fun project and I loved how they turned out - they feel like us!
 I ”letterpressed” our invites by hand using a craft embossing machine and plates I designed and then had laser cut by Boxcar Press for $20. I used recycled cotton rag paper but you could even make your own if you have the space for drying and the time. We had around 150 3 page invites to send out and the process was a bit time consuming but they turned out beautifully and best of all, saved us literally hundreds of dollars. To have them letterpressed professionally would have cost over $2,000 and to have them printed for us without the letterpress would have been close to $300. If you aren’t obsessed with letterpress and want to cut even more fat, just print them on your home inkjet printer! If you don’t have a printer you can also have a large stamp made and stamp each invite onto your home made paper. I tied ours together with a piece of jute twine and then mailed them in kraft paper envelopes bought wholesale.
 had to obscure our identity in this one :)
1. Find your paper and envelopes. If you have a color theme you're going with, now's the time to play around with it. I'm having a very natural palette with cream, paper bag brown, light grey and a pop of yellow (for Scrapple's native New Mexico). I bought kraft paper envelopes wholesale here at $6.75 for 25. I'm going for a speakeasy meets the forest look (roll eyes here) so I went with a natural white recycled rag paper. It's stiff and thick enough to press into without feeling like cardboard. As I mentioned earlier, you could save even more and make the paper yourself. Just make sure you have the time or the help to make it happen. This photo series has a great how-to on DIY recycled paper making. If you want a crisper look, go with something cut and smooth - just google wholesale paper.
2. Design your Invites. I grew up on Photoshop so naturally that's what I used to design my invites. If you're fairly handy with your computer I would give photoshop a shot. It's an expensive program, but Adobe has a 30 day trial which will be more than enough time for you to do your invites. If it's more comfortable for you, you can sketch something by hand or use a template. Check out some of the beauties for free from Download and Print at iDiY:


3. Prep your files for plate printing. Boxcar Press gives great instructions on this process for different programs here. For Photoshop I followed these instructions "Bitmap images at 1200 dpi work best (you can set this in Image>Mode... menu with the 50% Threshold method). Preferred file format: TIFF (with LZW compression)." It sounds scarier than it really is. Just make sure you save as a TIFF. I emailed my files to the Boxcar team and gave them a call to check and make sure everything looked good to them before putting my order in. They were a huge help and I would definitely reccomend doing the same - catching a mistake at this point is important!
4. Decide on your press method. I used the L Letterpress because I was pressed for time and we don't have access to the tools needed to build your own press, or a place to store it when it's made. There is a great tutorial on how to make one here that someday when my L breaks I'd love to try. Pressing the text and image into the paper really gives an amazing effect to the design and I'm sure we'll use this occassionally in the future for things we can easily make like business cards etc. (or I'll read this 4 years down the road laughing hysterically at the thought).
5. Print your plates. I printed mine at Boxcar, but I'm sure there are other places that do this. Feel free to check out the market. Boxcar charges per square inch printed. If your invite has a very airy feel and lots of space you can cut down on cost by placing things closer together on the plate and then just cutting (super easy to do with regular scisors) the plate and arrange with the correct spacing before printing in your press. If you're afraid of trying to get the ailgnment perfect another way to max out the space you're paying for is to add other little graphic elements that you can cut out and use in other places in your projects. I added "Thank You" in one of the fonts I had used on the invites, our initials blown up with the little birds that are a motif in our wedding sitting on them, and a little mini sketch of our heads that I had drawn up. I can use these to make thank you cards and decorate the escort cards or wedding programs.
6. Time to print! I would recommend taking over a kitchen table for this project. You have lots of things you'll need close by and don't want to be cluttered when working with wet ink! Also, being prepared helps alot - watch a video or two of someone actually doing this so you know what to expect. Stick your plates onto the inside of the clear top layer of the press, being sure to align them to print as you would like. After spreading out a dab of ink evenly onto the ink plate with your brayer, ink your printing plate evenly. You want to use a light hand as too much ink will bleed out and make your text look fuzzy. Carefully close the press, being sure your paper is aligned as you would like, and crank through the embosser. Practice once or twice on scrap paper until you figure out how to ink evenly. Be sure to ink the plate before each print and also look out for smudges on the flat parts of the plate which could come off on your invite if not wiped away. I kept little squares of papertowl and goo gone close by for this. The actual printing will take some time, one way to cut back is to stick with a one color print and narrow your invite down to one page.
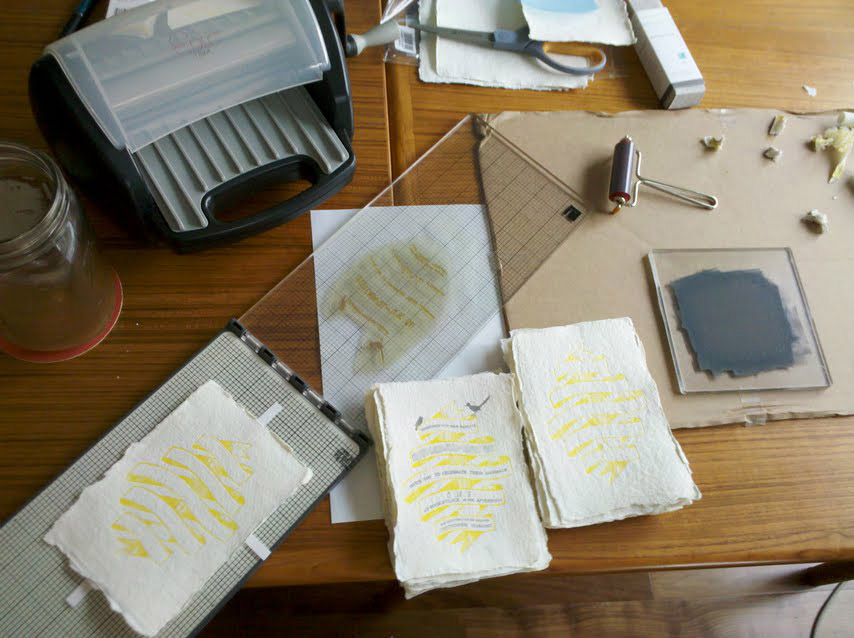 my setup
6. Seal the deal. I tied my pages together with a bit of knotted jute twine (ribbon would also be pretty) and then "sealed" the envelopes with the stamp of our heads that I had sketched and printed onto the plate.
If you give this a shot feel free to post any questions you might have on the process. I'd be happy to help and would love to see what you come up with!